
Notion is a multi-featured app for organizing all sorts of content, from notes to calendars and reminders. Notion recently launched its own API, and in this article we’ll use this API to create a small interface that will connect Notion to our own database.
Notion has released its API to the world in open beta. It has excellent documentation, it’s really easy to access and, more importantly for us JavaScript devs, it also offers as SDK for JavaScript. 🎉
While no previous knowledge is needed to follow along with this article (I’ll provide all the required steps) we will be dealing with front-end and back-end code, as there’s a bit of Node.js and Express setup involved.
Setup
Our setup will be split into two sections. The first will cover the steps that we need to follow on the Notion software and API. In the second, we’ll get our hands on the code by initializing a folder, adding the Notion dependency and creating the initial index.js and editing the package.json to make everything work.
To follow along, you’ll need a Notion account (more on that below), as well as a recent copy of Node installed on your machine. As ever, the code for the tutorial can be found on GitHub.
The Notion Setup
If you don’t already have a Notion account, please create one by following this link. It has a very generous free tier and you don’t have to add any payment information!
After creating your account and logging in, create a new page by choosing Add a page and give it a name. For this tutorial, we’ll choose the Table database. This will give us an empty table, which is exactly what we want!
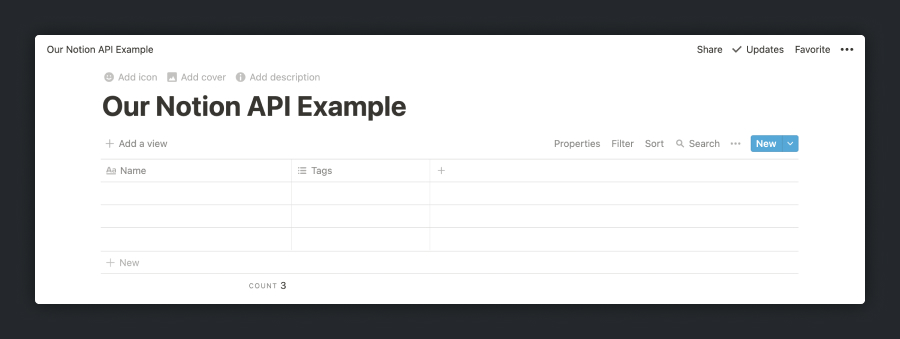
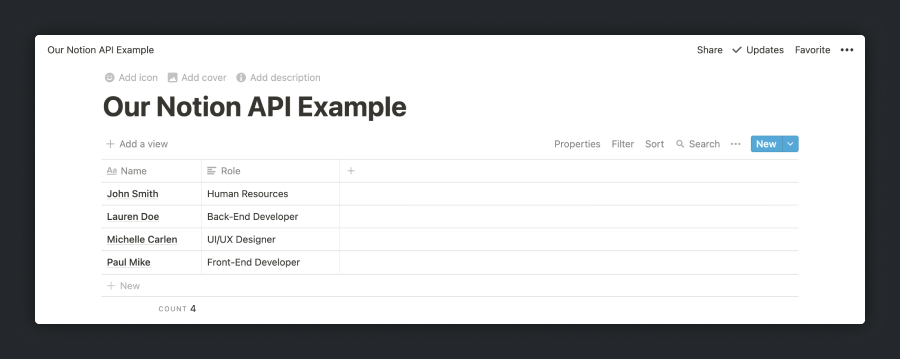
The next step is to create some columns on our database and fill them with some mock data. For this tutorial, we’ll work just with Name and Role fields, as if we’re working with a database of employees in a company.
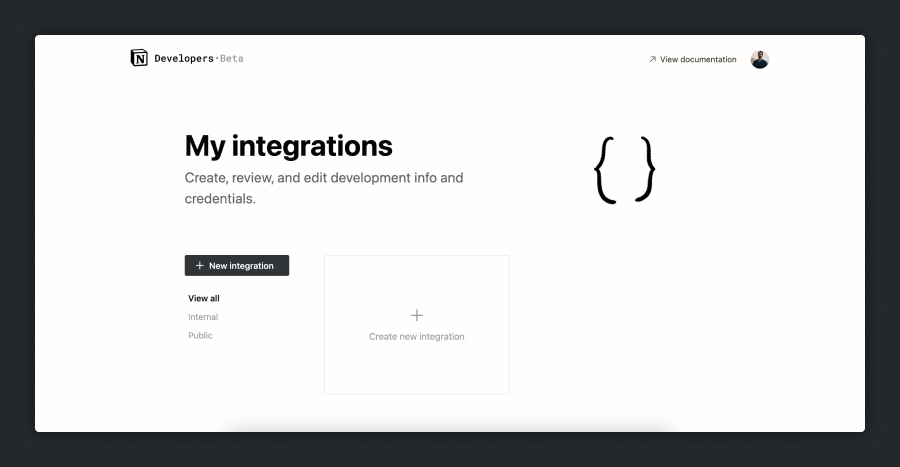
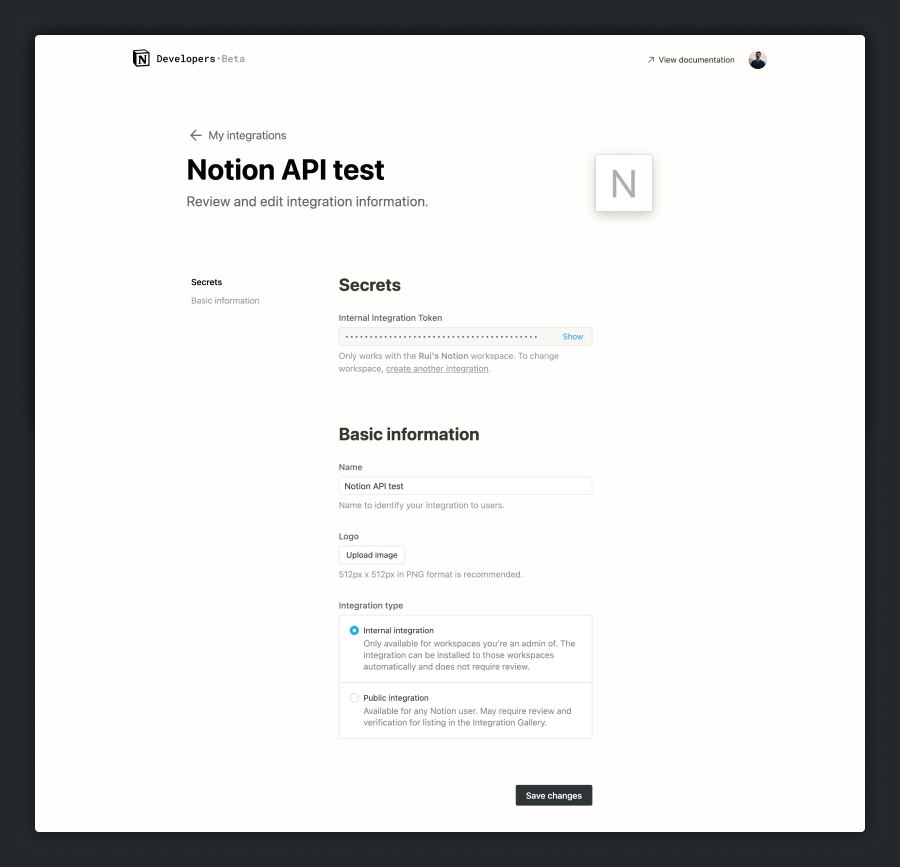
Now we’ll go to the Notion API website. You’ll see a My integrations link in the top corner. If you click it, you’ll be directed to a screen showing “My integrations”, and yours will be empty, of course.
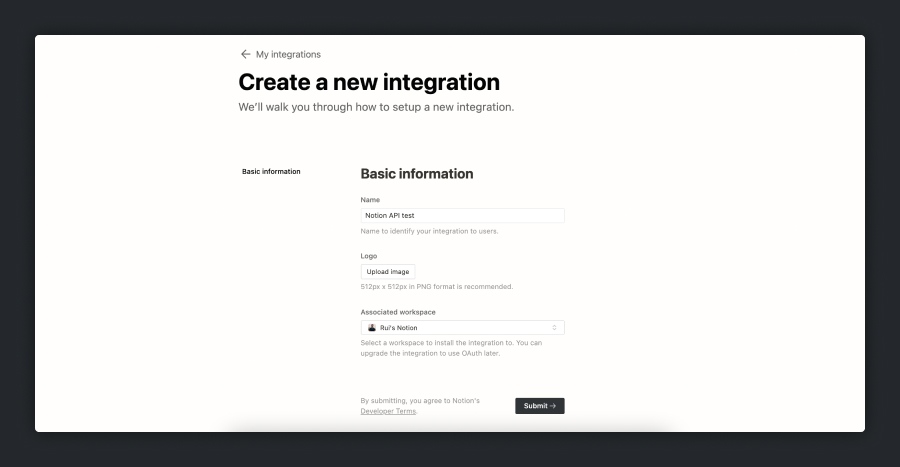
Press Create new integration, fill in your title and be sure to choose your Associated workspace (it will be chosen by default but make sure of this). Press Submit and you’ll be directed to a new page with an Internal Integration Token (we’ll use this on our code) and with two option boxes for where you want to use your integration. You don’t need to do anything on this page other than copying your token and press Save changes.
Note: at the time of writing, there doesn’t seem to be a way to delete integrations, so name them wisely.
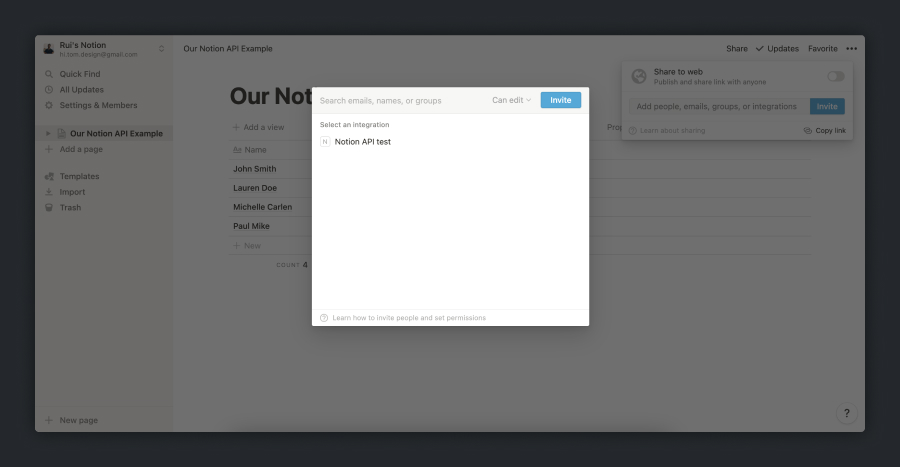
Now go back to your Notion workspace. On our newly created database, we want to press Share, then Invite. You’ll then be able to choose your newly created integration. Choose it and press Invite, and your Notion setup is done. Well done! 🙌
The code setup
Now let’s do some code. Open your terminal and do mkdir notion-api-test (this will create a folder called notion-api-test) on your chosen location, and after that, step into your folder with cd notion-api-test and do npm init -y (this command will create a package.json with some basic setup and the -y flag answers to some prompts automatically so you don’t have to bother yourself with them).
As I mentioned before, we’re going to use notion-sdk-js, and for that we need to install it as a dependency, so we’re going to do npm install @notionhq/client.
Now, open your notion-api-test on your code editor and create an initial index.js on the root and edit the package.json scripts by replacing what’s there with the following:
"scripts": {
    "start": "node index"
},
Let’s also create a .gitignore file and another one called .env. The .gitignore allows you to put different file/folder names inside, and that means that these files/folders won’t be added to your repo when you push you code. This is very important, because our integration token(remember that?) will be inside the.env file, like this:
NOTION_API_KEY = YOUR_TOKEN_HERE
That means that inside your .gitignore you should add this on the first line:
.env
Now that we have an .env file, we should also add a new dependency, dotenv, so you can load your NOTION_API_KEY variable. You can do that by doing npm install dotenv.
The code setup is now done 🎉.
Pulling Data From the Notion API
Now that the boring part is over, let’s get to the good stuff! Our index.js file will be a Node.js file, and the following code block shows our starting code and what each line exactly does!
// this will allow us to import our variable
require("dotenv").config();
// the following lines are required to initialize a Notion client
const { Client } = require("@notionhq/client");
// this line initializes the Notion Client using our key
const notion = new Client({ auth: process.env.NOTION_API_KEY });
We also need an extra thing here, which is the ID of the database that we created on our Notion workspace. This can be obtained from the browser’s URL bar. It comes after your workspace name (if you have one) and the slash (myworkspace/) and before the question mark (?). The ID is 32 characters long, containing numbers and letters.
https://www.notion.so/myworkspace/a8aec43384f447ed84390e8e42c2e089?v=...
                                  |--------- Database ID --------|
For security purposes, you should also paste this ID into your .env file, so that it looks something like this:
NOTION_API_KEY = YOUR_TOKEN_HERE
NOTION_API_DATABASE = YOUR_DATABASE_ID_HERE
We’ll then import it into our index.js with this:
const databaseId = process.env.NOTION_API_DATABASE;
Now, to make sure that our API is working, let’s create a function that makes a call to our database. To do it, we’ll create an async function:
const getDatabase = async () => {
  const response = await notion.databases.query({ database_id: databaseId });

  console.log(response);
};

getDatabase();
If you now run npm start in your terminal, you should see a log of an object with a results property that has an array. That array contains the entries in your database. To look into them, we can do the following:
const getDatabase = async () => {
  const response = await notion.databases.query({ database_id: databaseId });

  const responseResults = response.results.map((page) => {
    return {
      id: page.id,
      name: page.properties.Name.title[0]?.plain_text,
      role: page.properties.Role.rich_text[0]?.plain_text,
    };
  });

  // this console.log is just so you can see what we're getting here
  console.log(responseResults);
  return responseResults;
};
The code above is mapping through our results (matching the entries in our database) and we’re mapping the paths for different properties to names that we’re choosing (in this case, id, name and role). Notice how specific the object path is. I’ve used optional chaining to account for blank rows in the database, or rows where one or the other of these fields isn’t filled out.
Either way, feel free to play with the different properties, and be aware that this is a matter of trial and error, and that every API behaves and organizes the information differently. The important thing here is to go through each property until we get to the info we’re looking for.
If looking into each property and using console.log() is not your thing, you could always use Postman to inspect the response. Unfortunately, that’s not within the scope of this tutorial, but you could check the “How to Master Your API Workflow with Postman” post to give it a go!
Another important note here: notice the notion.databases.query that we’ve used. If you look at the Notion API documentation, you’ll see that we’re using POST | Query a database. We could use just GET | Retrieve a database, but here I would like to challenge you to read the documentation and try to sort the list differently!
Before we wrap this part, let’s change our getDatabase function so we can properly import it into another file that we’ll create. It should look like the following:
exports.getDatabase = async function () {
  const response = await notion.databases.query({ database_id: databaseId });

  const responseResults = response.results.map((page) => {
    return {
      id: page.id,
      name: page.properties.Name.title[0]?.plain_text,
      role: page.properties.Role.rich_text[0]?.plain_text,
    };
  });

  return responseResults;
};
Setting up an Express Server
With the previous step done, we now can successfully retrieve our results. But to be able to actually use them properly, we’ll need to create a server, and the easiest way of doing so — since we’re using Node.js — is to use Express. So, we’ll get started by running npm install express and creating a new file at the root called server.js.
If express confuses you, don’t worry. We’ll be using it to facilitate our work and create a quick back end and server to our application. Without it, we wouldn’t be able to properly retrieve our data, since we’re initializing our Notion client within our code.
On our server.js file, we’ll start by importing express, the module where we have our code (index.js), our getDatabase function, a port number, and a variable to initialize our express function:
const express = require("express");
// our module
const moduleToFetch = require("./index");
// our function
const getDatabase = moduleToFetch.getDatabase;

const port = 8000;
const app = express();

// this last command will log a message on your terminal when you do `npm start`
app.listen(port, console.log(`Server started on ${port}`));
Since we’re now importing our code into a new file, server.js, we should change our start command on package.json to look for server, so it should look like this:
"scripts": {
    "start": "node server"
},
If you now run npm start, you’ll see the Server started on 8000 message, which means that our setup is working as expected! Well done!
Now that our express app is working, we need to get our database to work with it, and we can do that with app.get(). This method needs a path (it won’t matter in our case) and a callback function (which will invoke our getDatabase function):
app.get("/users", async (req, res) => {
  const users = await getDatabase();
  res.json(users);
});
The above code uses the app.get method, as referred, and inside our callback function we’re getting the results from our function and we’re using the .json() Express middleware function that parses the request into readable and workable data. (You can learn a bit more about it in the official documentation.)
This means that we’re now successfully accessing our data, and that we’ve created a route to “fetch” it. As a final step, we should add app.use(express.static("public")); to our server.js file, so that the end result looks something like this:
const express = require("express");
// our module
const moduleToFetch = require("./index");
// our function
const getDatabase = moduleToFetch.getDatabase;

const port = 8000;
const app = express();

// the code line we just added
app.use(express.static("public"));

app.get("/users", async (req, res) => {
  const users = await getDatabase();
  res.json(users);
});

app.listen(port, console.log(`Server started on ${port}`));
This last bit of code tells our back end to use a specific folder where we’ll create our front-end code, which will be the public folder. Here we’ll work with our HTML, CSS and JavaScript to access this /users route that we created on our back end. Let’s get to it!
Continue reading
Getting Started with the Notion API and its JavaScript SDK
on SitePoint.

