
In this article, you’ll learn how to create an email alias and how to utilize it in the best way possible to secure your mailbox, protect your privacy and declutter your real email inbox.
What Is an Email Alias?
An email alias is a unique email address you’ve created that functions like a nickname, or an on-the-fly email address that you can use for specific tasks. The underlying technology is quite simple, but grants you way more power than you may be thinking right now.
Email aliases can be platform-specific or platform-agnostic.
Platform-specific aliases are connected to a specific email client, such as Gmail, Outlook, Yahoo or your business email address (for example, on Rackspace or Godaddy). These aliases are deeply integrated in the ecosystem of the provider, and can’t be used outside of it.
Platform-agnostic aliases allow you to connect multiple mailboxes, even from different email providers, and create aliases for all of them. It’s a better, more streamlined approach for your aliases.
Why You Should Use an Email Alias
There are four main use cases for email aliases, so let’s explore them now.
Securing your primary inbox
An Email Alias secures your primary inbox. No one will ever know your real email address. Email aliases mask your email address, protecting your digital identity.
Aliases have little to no connection in terms of meaning, wording or redirections to your real mailbox. For example, your real email address could be <me@gmail.com> and one of the aliases for it could be <imarockstar@youbet.com> — which has zero connection to the source address.
Controlling your identity
Email aliases give you control of your identity online. They can be created, enabled and disabled in a single click.
If you’re like me, you probably created your primary email address when you were around 11, perhaps in middle school. There’s no way that address is still relevant to your use case and interests as an adult.
However, you can’t go back. You can’t delete it, since all your friends and work colleagues use it for serious reasons, and you can’t replace it everywhere online. You’re stuck.
Email aliases can be created, renamed, redirected, deactivated and deleted in a single click of your mouse. No complex setup, no hurdles.
Sending emails
An alias can be used to send emails, making it perfect for businesses that want to save a bit of money on their business addresses.
Yes, you could pay for a Google Workplace account for each of your teammates … or you could use free Gmail accounts and set up your professional online identity with aliases!
Yep, you read it right. You can connect a domain to a platform-agnostic email alias generator and create aliases with your professional domain that redirect messages to free mailboxes on Gmail, Outlook, Zoho and ProtonMail.
For example, if your domain is youbet.com, and you connect it to an alias generator service, you could create the aliases <info@youbet.com>, <support@youbet.com>, and <talent@youbet.com> — all on the same domain — and redirect messages to your real Gmail inbox <me@gmail.com>.
Your clients will never know the source and you’ll appear as professional as you can be using aliases!
It’s free or very affordable!
Come on, we wouldn’t be talking about it if it wasn’t. That’s what’s innovative about it. 🔥
You can have your aliases for free or a very, very affordable fee — certainly much (I mean a loooooot) lower than professional email hosting for sure!
How to Create an Email Alias in Gmail
Chances are you have a Gmail account. If you simply need an alias and you’re not interested in using it for business needs, you can create a free one from your Gmail Client.
Here’s how to do it:
-
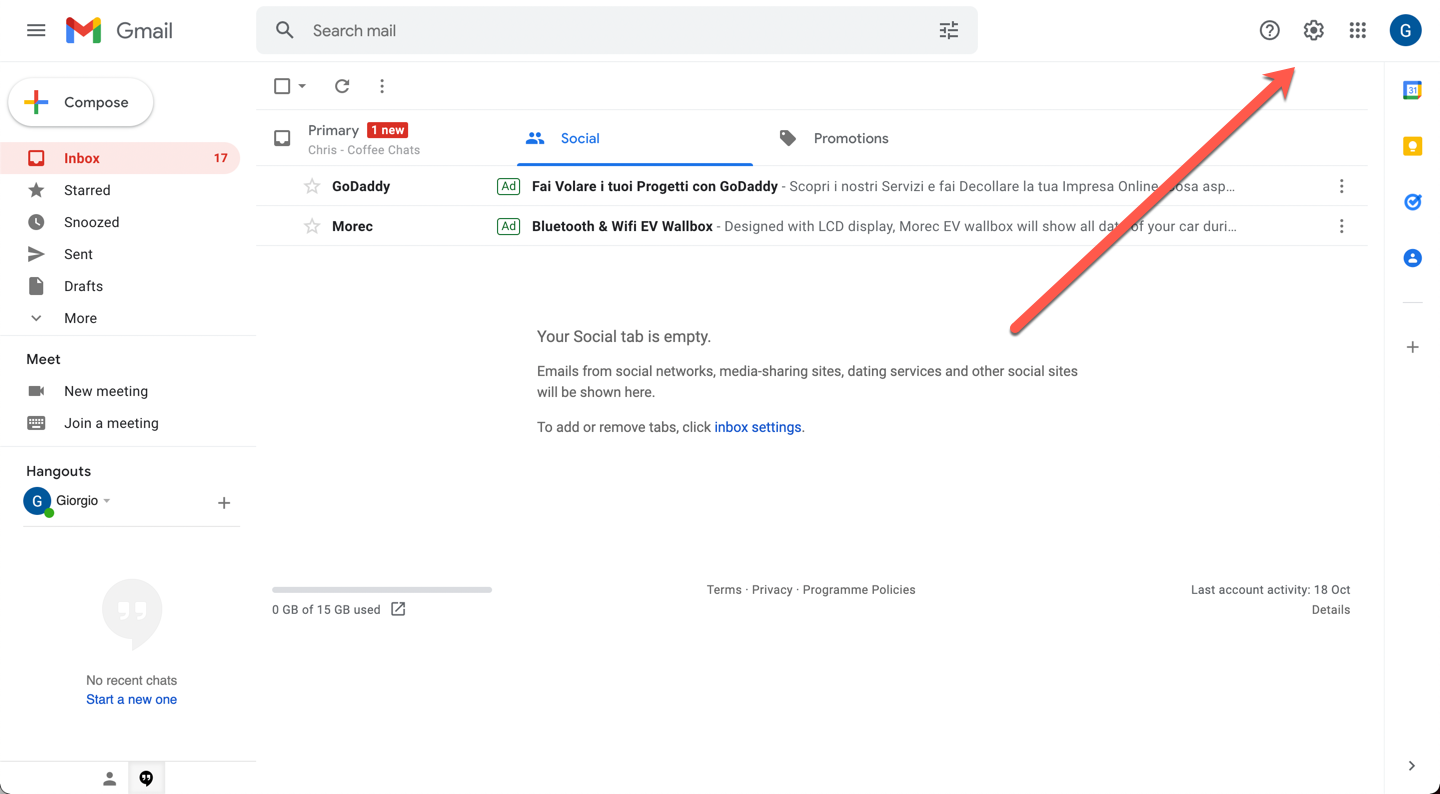
Log into Gmail and select the settings icon in the right corner.
-
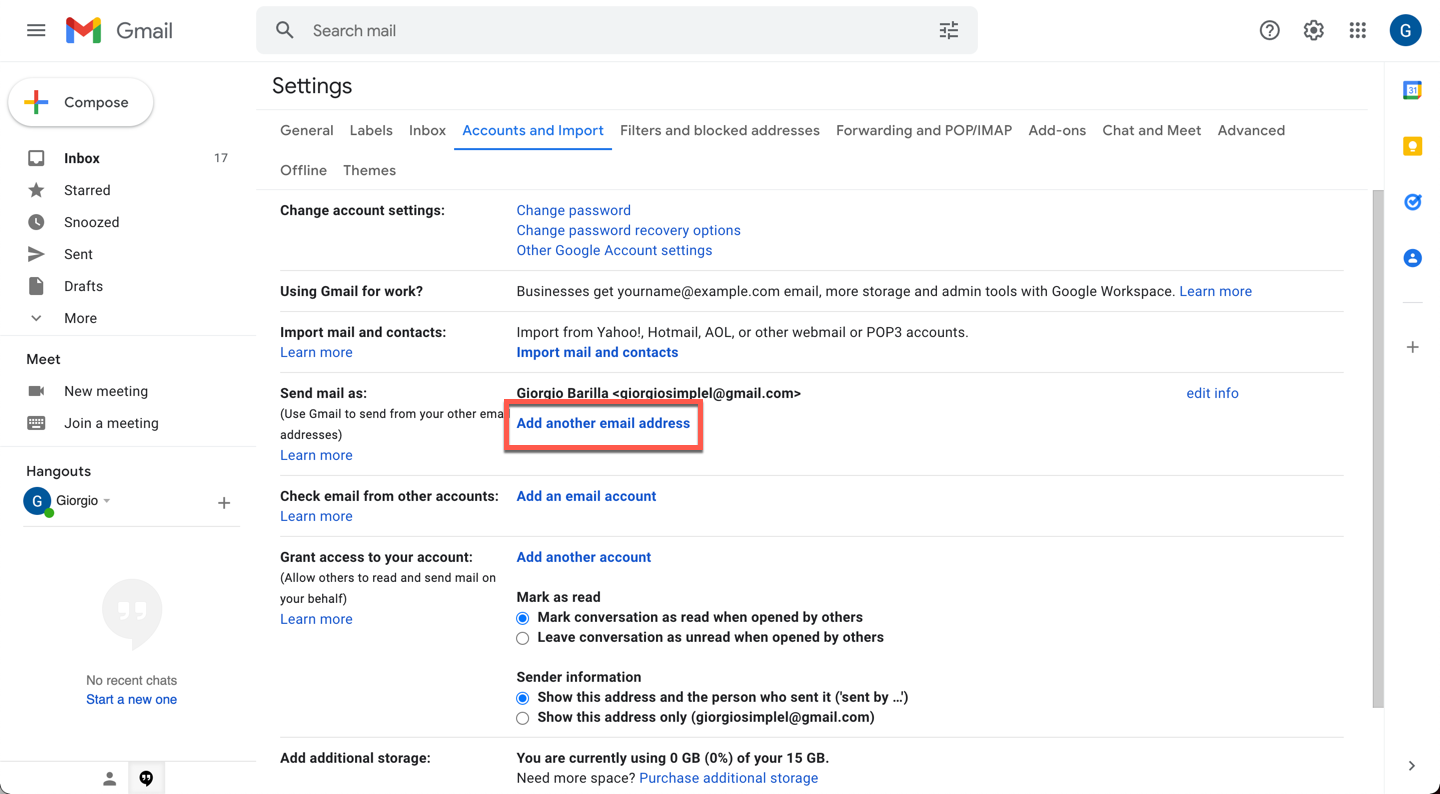
Click See All Settings.

-
In the top menu bar, select Accounts and Import.

-
Under Send Email As select Add Another Email Address.
-
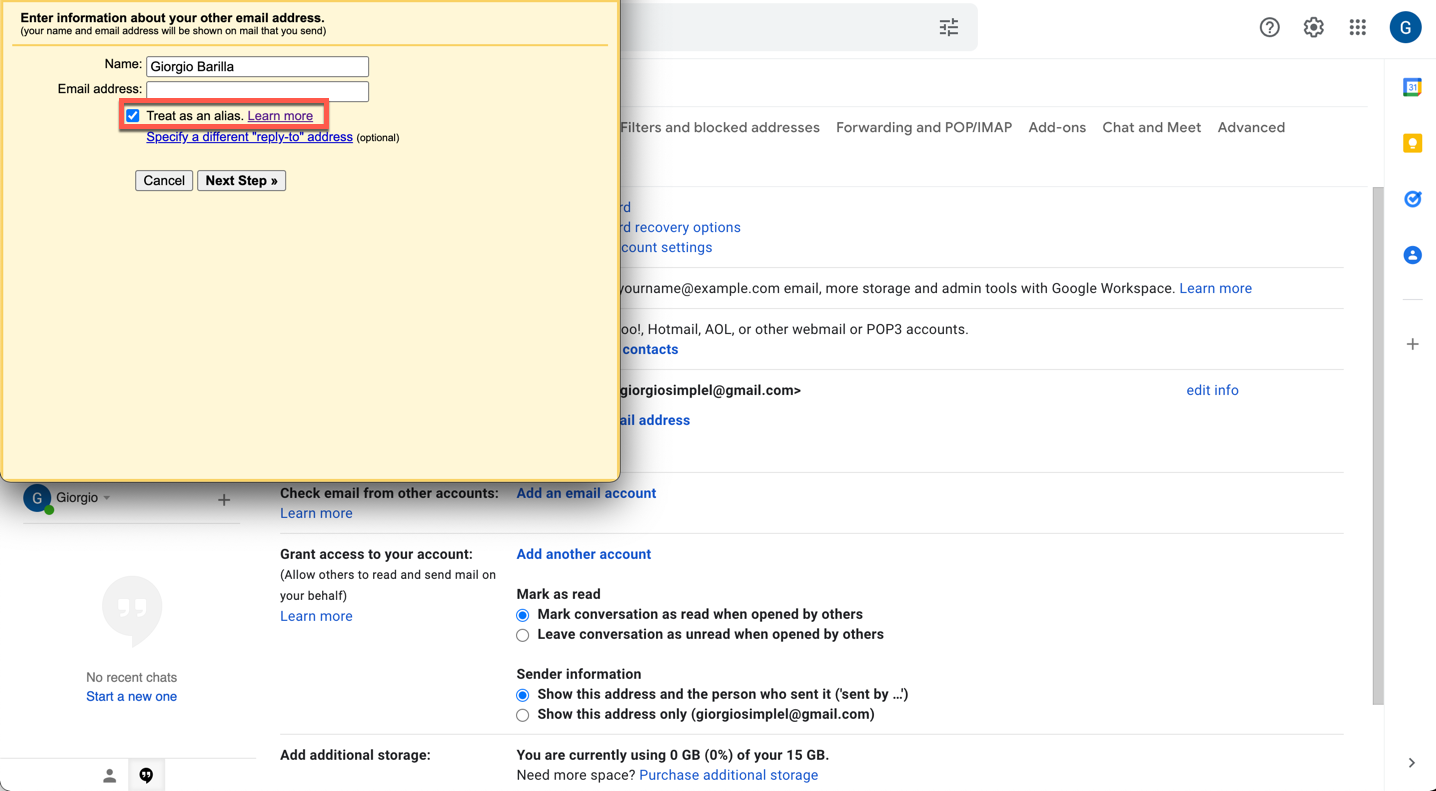
Add a new email address and make sure Treat as Alias is selected.
-
Once that’s done, when you send a message, choose which address to send from. Recipients see that the message came from whichever address you chose.
That’s it!
As you can see, this is not a very useful alias. You still need two email addresses, and all you’re doing is connecting them to the same email inbox and potentially hiding your real email address from the receiver.
However, you’re not optimizing your time or money, as you still need two accounts in two separate providers.
How to Create a Platform-agnostic Alias
If you want a fully platform-agnostic alias, one of the solutions available is SimpleLogin. (Disclaimer: I’m personally associated with SimpleLogin.)
To create a SimpleLogin account, head over to https://simplelogin.io and register for free.
-
Head over to https://simplelogin.io and register for free. Click on Sign Up at the top-right corner.

-
Input your email address and a password for your SimpleLogin account.

-
SimpleLogin will send a validation email to the address inserted.

-
Click on Verify Email in the email you just received.

-
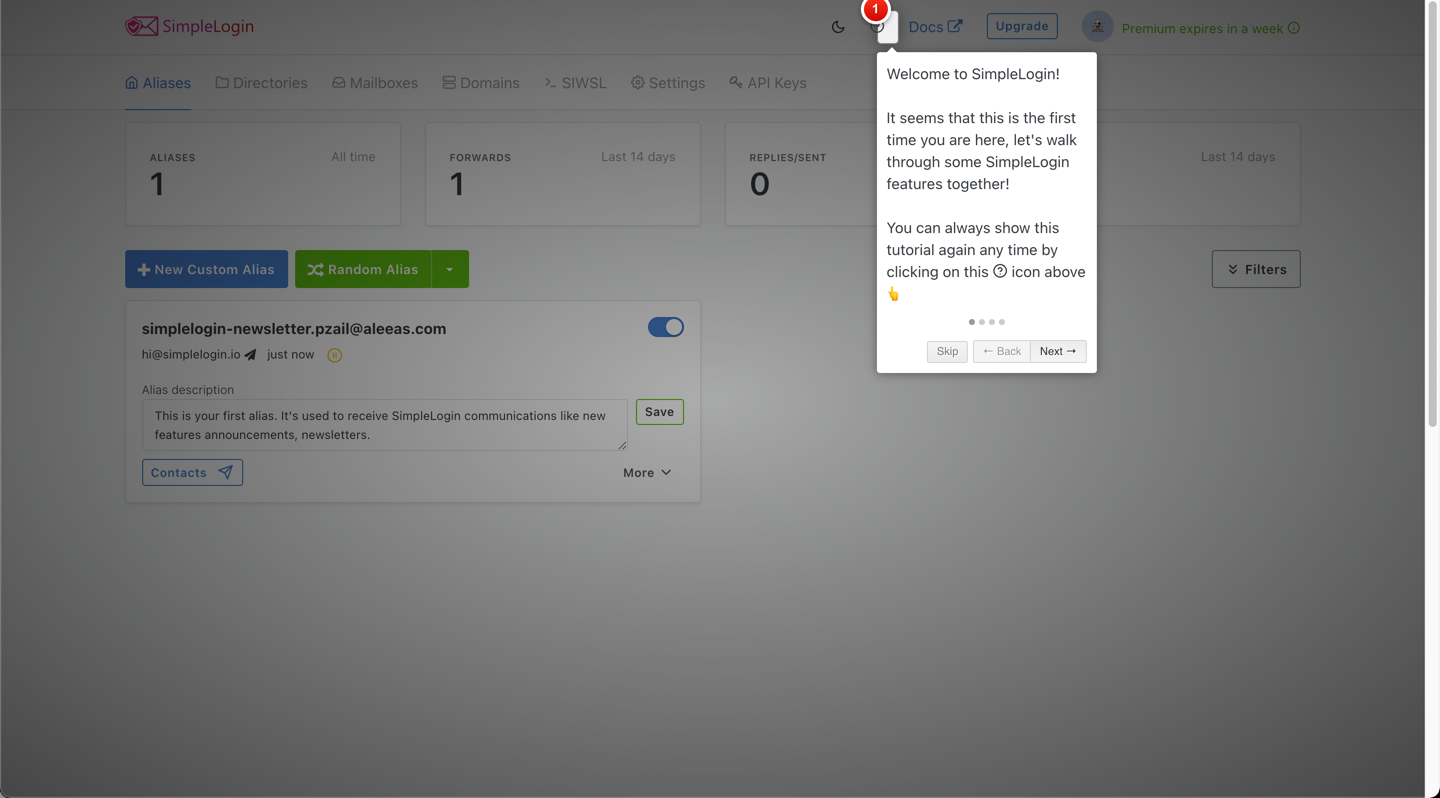
You’ll be redirected inside your SimpleLogin’s Dashboard! Make sure to follow the guided tutorial, as it provides important information and only takes a couple of minutes. 🎯
-
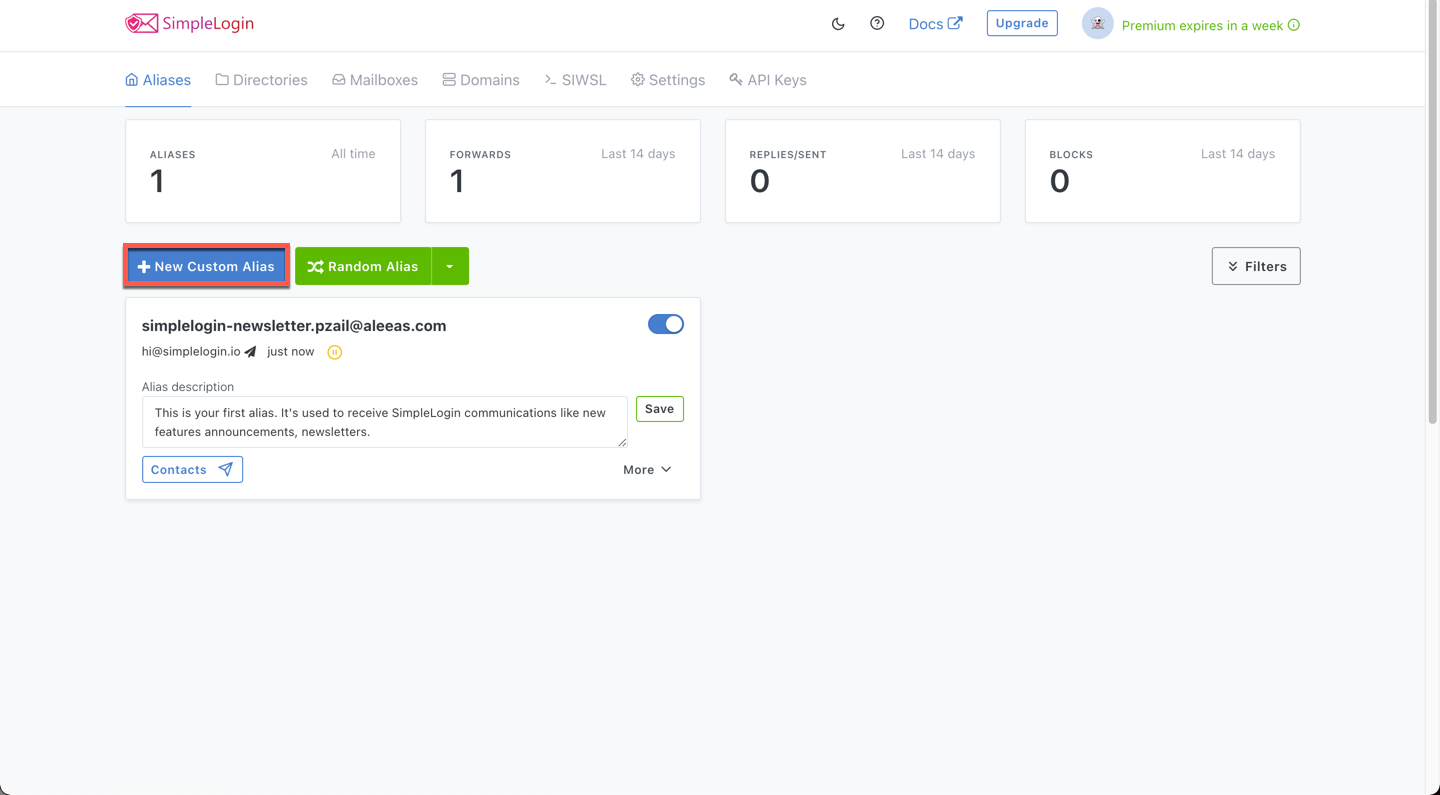
Your first alias will already be in the dashboard. That’s to receive email newsletters from SimpleLogin. If you wish to stop receiving it — you guessed it — just click on the toggle and the alias will be deactivated.

-
Now things get fun! Click on New Custom Alias.
-
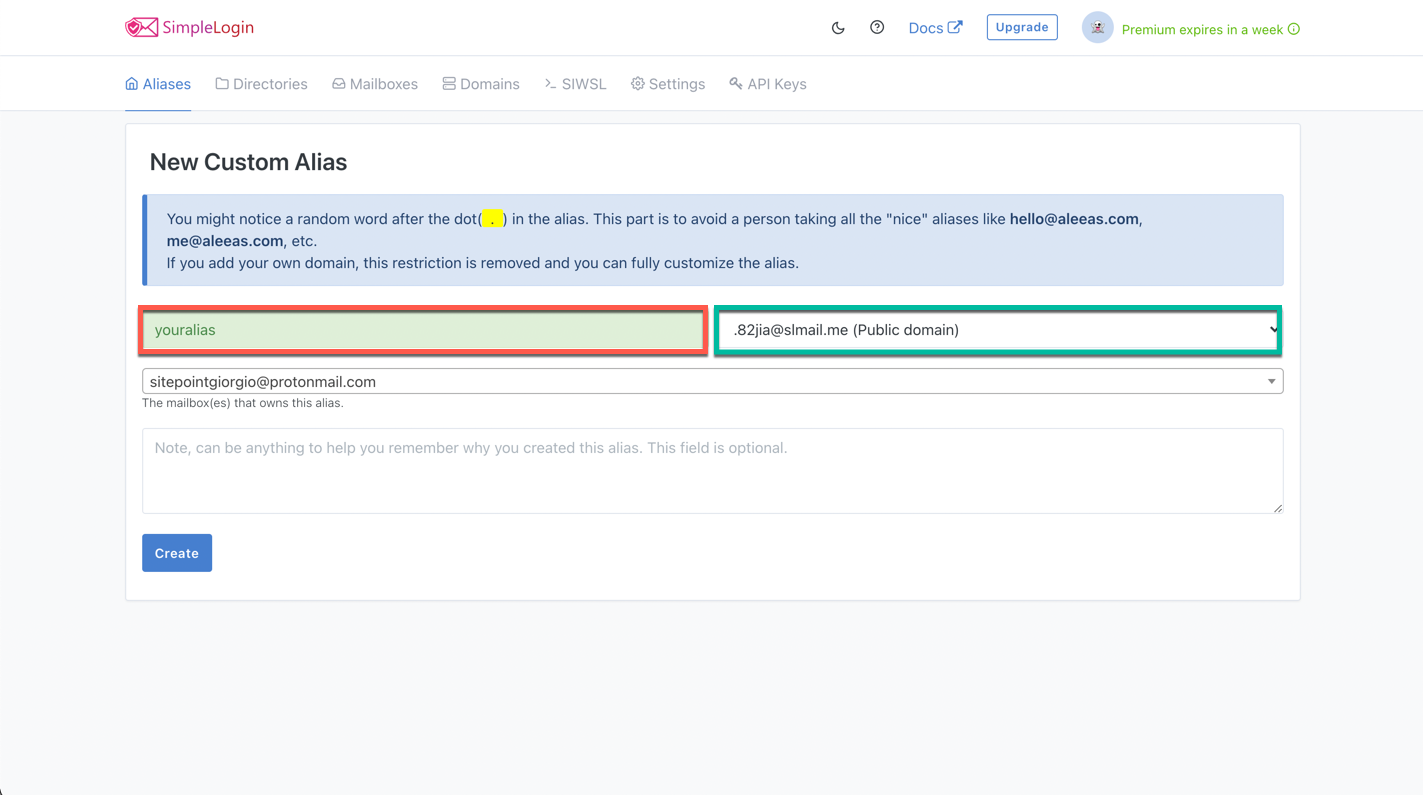
Choose your preferred alias name and a domain name from the list of publicly available, free domains SimpleLogin provides for all accounts.
-
Choose the real mailbox(es) that will receive emails sent to this alias. (You can choose more than one if you connect multiple email addresses!)

-
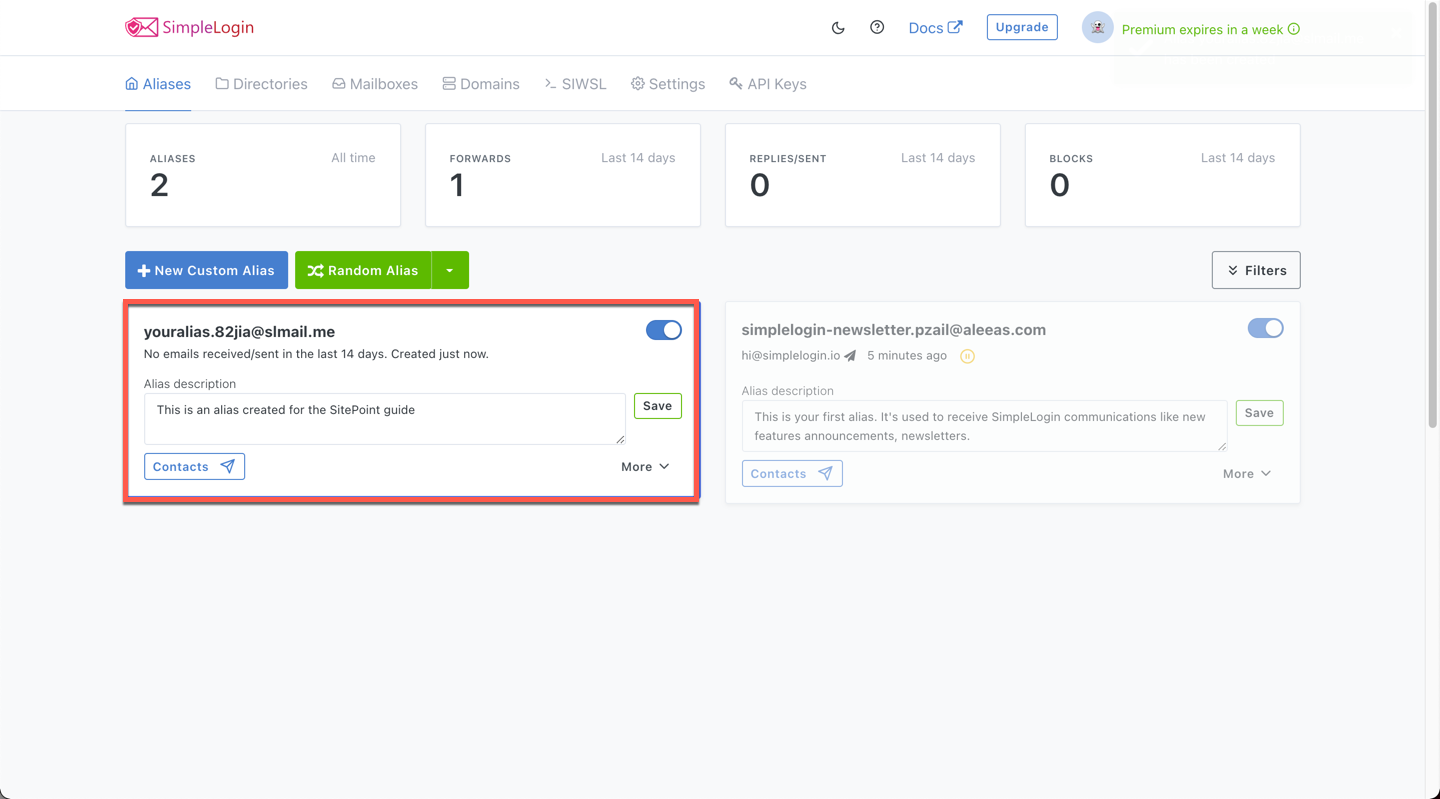
That’s it; your platform-agnostic alias is ready. It was painless, wasn’t it? 😊
Before we move on, it’s a good idea to test if the alias is working as intended. We just need to send an email to the alias we just generated. Let’s do that from Gmail.
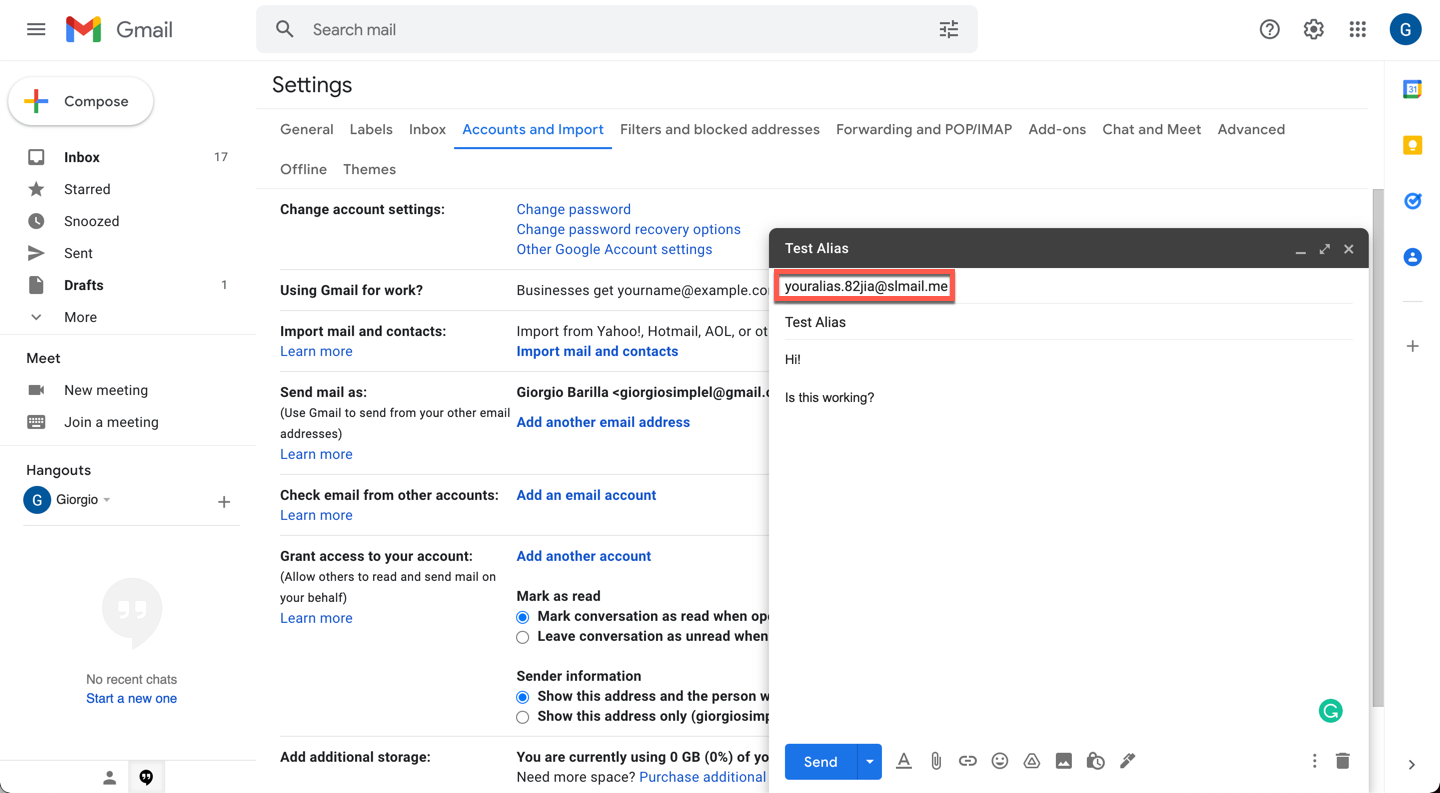
That’s our freshly created alias! Let’s send the email.
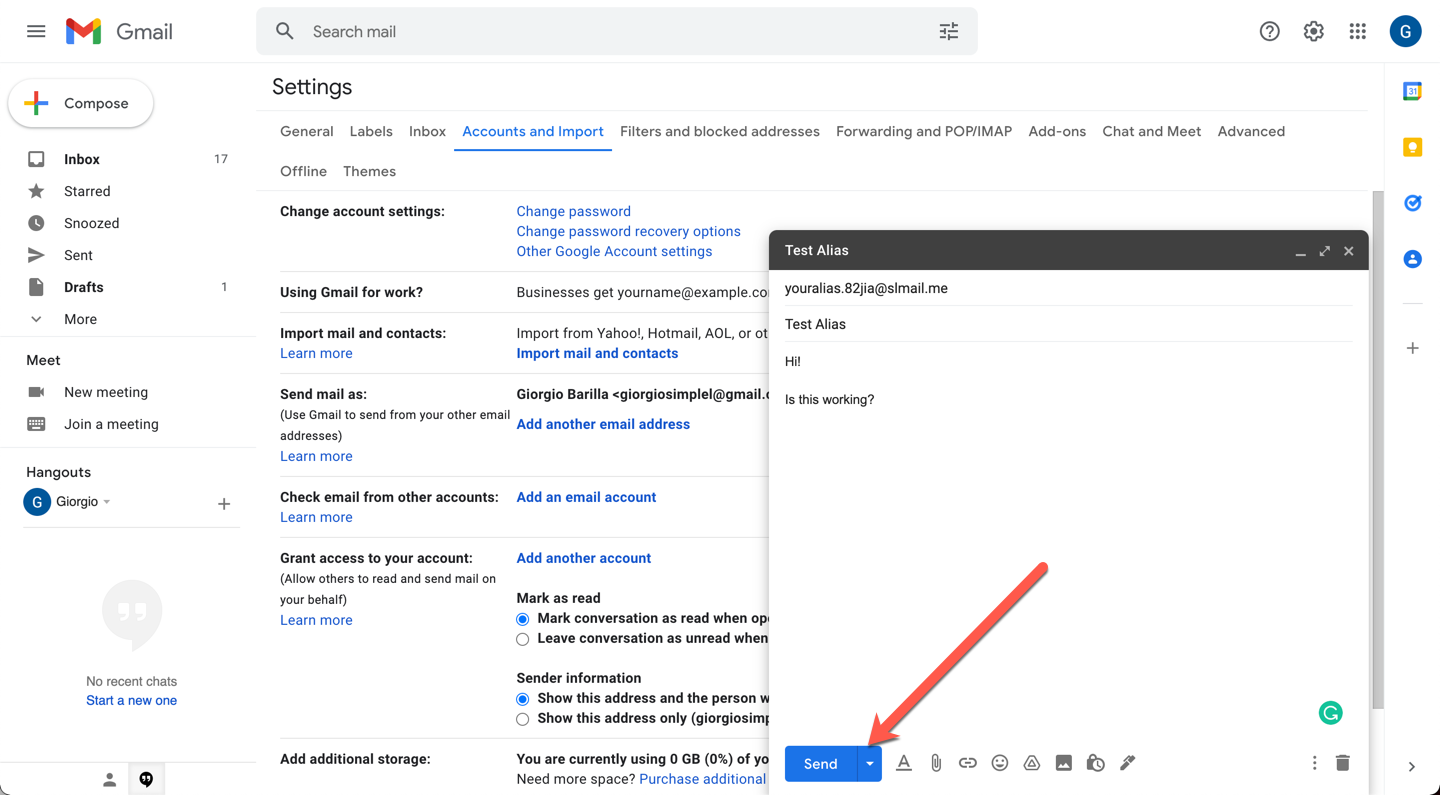
If everything worked as intended, we should now receive the email to the email alias associated with your alias.82jia@slmail.me, hence giorgiositepoint@protonmail.com. Let’s check!

Here we go: there’s the email sent to the alias. Beautiful, isn’t it? Almost feels like magic.
Just to confirm our identity is indeed protected, let’s respond to the email from our inbox.

If everything worked as intended, we should now receive the response in our Gmail inbox with the “From Address” showing our alias, not our real Proton inbox.
Time for the truth…

Wonderful!
Just to recap, we:
- created a platform-agnostic alias that we can connect to multiple mailboxes
- sent an email to the alias we just created
- received the message in the connected mailbox
- replied to that message
- received the reply from our alias, not the real mailbox
All of this for free.
If you’re more of a visual learner, here’s a video tutorial explaining the basics of the tool.
Tools for Creating Email Aliases
SimpleLogin isn’t the only tool for creating email aliases. There are several others that allow you to create platform-agnostic, beautiful and simple to use aliases.
Here are a few:
Continue reading
Stay Private and Declutter your Inbox Using Email Aliases
on SitePoint.

